

Looking to enhance your video conferencing or live streaming experience? Transform your Android phone into a high-quality webcam with this comprehensive guide. We’ll cover everything from selecting the perfect app to configuring your phone and computer for optimal performance. Whether you’re aiming for a professional setup for work or a casual stream for fun, using your Android phone as a webcam is a cost-effective and versatile solution. Learn how to unlock the hidden potential of your device and elevate your video quality beyond the built-in webcam on your laptop or desktop. This guide provides step-by-step instructions and troubleshooting tips to ensure a seamless transition to using your Android as a webcam.
This guide caters to users of all technical levels, providing a straightforward approach to setting up your Android webcam. We’ll explore popular webcam apps, discuss the advantages and disadvantages of using a wired connection versus wireless, and address common issues users encounter during the setup process. By the end of this guide, you’ll be equipped with the knowledge and resources to transform your Android phone into a powerful and flexible webcam, allowing you to participate in video calls, record high-quality videos, and stream content with ease. Upgrade your video experience today by leveraging the capabilities of your Android phone.
Why Use Your Android Phone as a Webcam?
Repurposing your Android phone as a webcam offers a compelling blend of convenience and enhanced video quality, often surpassing integrated laptop cameras. Superior optics and higher resolutions available on many smartphones contribute significantly to improved video clarity, a crucial factor for professional video conferencing, live streaming, and content creation.
Cost-effectiveness is a major advantage. Instead of investing in a dedicated external webcam, you can leverage an existing device. This is especially beneficial for those who only occasionally require a high-quality camera.
Portability and flexibility are also key benefits. With readily available apps and a simple setup, your Android phone can be quickly transformed into a portable webcam compatible with various devices and operating systems.
If your built-in webcam is malfunctioning, using your phone provides a quick and reliable backup solution, ensuring uninterrupted communication and productivity.
Choosing the Right App for Your Needs
Selecting the right app is crucial for a smooth webcam experience. Consider these factors when making your choice:
Operating System Compatibility
Ensure the app supports both your Android version and your computer’s operating system (Windows, macOS, or Linux). Check the app description for compatibility information.
Features
Different apps offer varying features. Some provide basic webcam functionality, while others include advanced features like video effects, resolution adjustments, and audio controls. Determine which features are important to you.
Ease of Use
Look for an app with a user-friendly interface. The setup and connection process should be straightforward, even for non-technical users.
Reviews and Ratings
Check user reviews and ratings on app stores. This can provide valuable insights into the app’s performance, stability, and overall user experience. Look for apps with consistently positive feedback.
Cost
While many reliable webcam apps are free, some offer premium features through in-app purchases or subscriptions. Consider your budget and whether the extra features justify the cost.
Setting Up Your Android Phone for Webcam Use
Preparing your Android phone for use as a webcam involves a few key steps. First, ensure your phone’s operating system is up-to-date. This ensures compatibility with webcam apps and optimal performance. Next, consider your phone’s placement. A stable mount or tripod is recommended to prevent shaky video. If using a wired connection, check your USB cable for damage and ensure it supports data transfer. For a wireless connection, connect your phone and computer to the same Wi-Fi network.
Enable developer options on your phone if you haven’t already. This is usually done by repeatedly tapping the build number in your phone’s settings. Once enabled, activate USB debugging within the developer options. This allows your computer to communicate with your phone for webcam functionality. Finally, close any unnecessary apps running on your phone to free up resources and improve performance during webcam usage.
Connecting Your Phone to Your Computer
Once you have chosen and installed a webcam app on your phone, the next step is connecting it to your computer. There are two primary methods for establishing this connection: USB and Wi-Fi. Each method has its advantages and disadvantages.
USB Connection
A USB connection typically offers lower latency than Wi-Fi, making it ideal for situations where real-time responsiveness is crucial. To connect via USB, use a compatible cable to connect your phone to your computer. Ensure your phone is set to file transfer mode (sometimes called MTP or PTP). Your chosen webcam software should automatically detect your phone.
Wi-Fi Connection
Connecting via Wi-Fi offers greater flexibility. Your phone and computer need to be on the same network. The setup process usually involves scanning a QR code displayed on your computer within the app on your phone, or entering an IP address. While generally more convenient than USB, Wi-Fi can be susceptible to network interference, potentially affecting video quality and introducing latency.
Choose the connection method best suited to your needs and environment. For optimal performance, a strong, stable Wi-Fi network is essential for wireless connections, while a high-quality USB cable is recommended for wired connections.
Adjusting Webcam Settings for Optimal Performance
Once your Android phone is connected and recognized as a webcam, you can fine-tune its settings for the best possible video and audio quality. These settings may reside within the webcam app itself, your computer’s operating system, or the software you’re using the webcam with (e.g., video conferencing software).
Resolution: Adjust the resolution for a balance between quality and performance. Higher resolutions offer sharper images but may strain your system resources.
Frame Rate: A higher frame rate results in smoother video, but requires more processing power. Experiment to find the optimal setting for your setup.
Focus and Exposure: Many webcam apps offer manual controls for focus and exposure. Adjust these to optimize for your lighting conditions. Ensure your subject is well-lit and in focus.
Audio Input: Select your Android phone’s microphone as the audio input source in your computer’s sound settings or within your video conferencing software. Adjust the input volume as needed.
Orientation: Check if your video is appearing correctly. If the image appears rotated, you may need to adjust the rotation settings within the webcam app or your computer’s software.
Testing Your Android Webcam Setup
After establishing a connection between your Android phone and your computer, it’s crucial to thoroughly test the setup to ensure everything functions correctly.
Start by opening a video conferencing application or any software that utilizes a webcam. Select your Android phone as the video input source. You should see the live feed from your phone’s camera displayed within the application.
Check the video and audio quality. Pay attention to aspects like resolution, frame rate, and clarity of the image. Similarly, ensure the audio is transmitting clearly without any distortion or lag. If you encounter any issues, refer to the troubleshooting section for potential solutions.
Test different lighting conditions to see how your Android webcam performs in various environments. Observe the image quality in both bright and dimly lit settings. This will help you optimize your lighting setup for optimal video quality during actual usage.
Troubleshooting Connection or Performance Issues
Experiencing problems with your Android webcam setup? This section provides solutions to common connection and performance hurdles.
Connection Issues
If your computer isn’t recognizing your phone, verify the USB cable is securely connected to both devices. Try a different USB port on your computer. Restarting both your phone and computer can also resolve minor connection glitches. Ensure your phone’s developer options and USB debugging are correctly configured. If using a Wi-Fi connection, check your network strength and stability.
Performance Issues
Lagging or poor video quality can stem from several factors. Close unnecessary apps on your phone to free up resources. Reduce the video resolution in your webcam app settings. If using a wireless connection, try moving closer to your router. Ensure your phone is adequately charged as low battery can impact performance.
Advanced Tips for Webcam Streaming
Enhance your Android webcam streams with these advanced techniques. Consider using an external microphone for improved audio quality. Positioning a dedicated microphone closer to you reduces background noise and enhances clarity. Experiment with different microphone types, such as lavalier or condenser microphones, to find the best fit for your setup.
Lighting plays a crucial role in video quality. Ensure your face is well-lit and avoid harsh shadows. A softbox or ring light can dramatically improve the visual appeal of your stream. Adjust the white balance settings in your webcam software to optimize color accuracy for your specific lighting conditions.
Software enhancements can further refine your stream. Explore features like background blurring or replacement for a more professional look. Some webcam apps offer chroma keying functionality, allowing you to composite yourself onto a custom background image or video. Finally, ensure your webcam app is up-to-date to leverage the latest performance improvements and features.
Best Practices for Webcam Security and Privacy
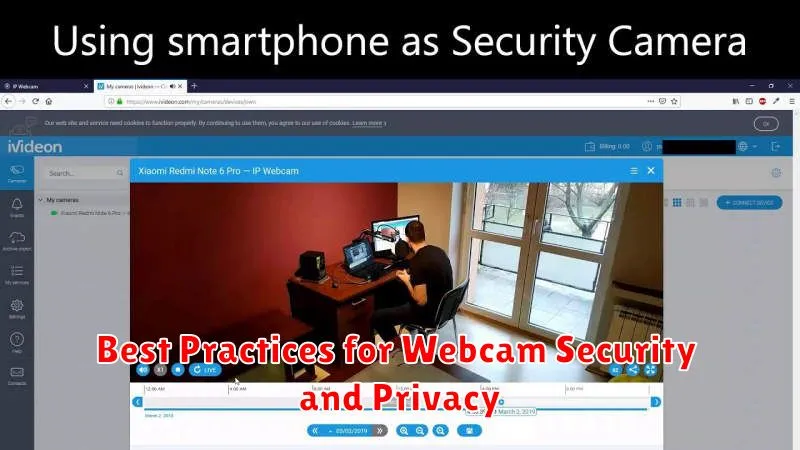
Using your Android phone as a webcam presents potential security and privacy risks. Taking precautions is crucial to protect yourself.
Secure your phone: Ensure your phone has a strong passcode or biometric lock enabled. This prevents unauthorized access to your device and webcam.
Choose reputable apps: Only download webcam apps from trusted sources like the Google Play Store. Research the app developer and read reviews before installing.
Review app permissions: Carefully examine the permissions requested by the webcam app. Grant only the necessary permissions and avoid apps that request excessive access.
Cover your webcam: When not in use, consider physically covering your phone’s camera lens with a piece of tape or a dedicated webcam cover. This provides an additional layer of security.
Be mindful of your surroundings: Be aware of what is visible in your webcam’s field of view. Avoid sensitive information or activities being captured.
Exploring Alternative Webcam Options
While using your Android phone as a webcam offers a convenient solution, exploring alternative options can provide enhanced features or cater to specific needs. Dedicated webcams often offer higher resolutions and better low-light performance compared to smartphone cameras.
USB Webcams: A readily available option, USB webcams offer plug-and-play functionality with most computers. They come in a wide range of price points and resolutions, from basic HD to 4K. Consider factors like frame rate, microphone quality, and mounting options when choosing a USB webcam.
Built-in Webcams: Many laptops and all-in-one computers come equipped with integrated webcams. While these are convenient, their quality can vary significantly. If your built-in webcam doesn’t meet your needs, an external webcam may be a worthwhile investment.
DSLR or Mirrorless Cameras as Webcams: For superior image quality, using a DSLR or mirrorless camera as a webcam is a powerful option. This often requires specialized software or hardware adapters and may involve a more complex setup process. However, the resulting video quality is significantly enhanced.